Lokiel's "Gina" (2004 Titanium SE)

Chat to do with your MX5/Miata/Eunos Garage Ride(s).

Moderators: timk, Stu, zombie, Andrew, The American, Lokiel, -alex, miata, StanTheMan, greenMachine, ManiacLachy, Daffy

User avatar
Lokiel
Forum legend
Posts: 4126
Joined: Thu May 28, 2009 2:39 pm
Vehicle: NB SE
Location: Brisbania

Re: Lokiel's "Gina" (2004 Titanium SE)

Postby Lokiel » Sun Nov 07, 2021 11:35 pm

After I'd finalised my coolant re-route, I filled the radiator and all seemed OK.
The next day I noticed a coolant pool on the floor at the rear of the engine - it had a slow leak!
Naturally a few swear words were expressed:

Image

That meant I had to flush the coolant again, remove the QMax block, clean the surfaces again and re-install the bar****d!

I'd used a gasket instead of the supplied QMax sealant because the first time it took a long time to bolt it up to the rear of the block and I was pretty sure it had wiped off in many places as I clumsily tried to fit it and get the nut and bolt on and tightened.
A couple of other guys in a video install recommended this too which seemed reasonable - reading through to the end of their comments though, they too re-did the install because theirs leaked and they used the QMax supplied sealant the second time.

Big tip when installing the QMax block, USE THE QMAX SUPPLIED SEALANT, NOT A GASKET!

I removed the block and cleaned the surfaces again.

This time I bought an inspection camera from Hare&Forbes, https://www.machineryhouse.com.au/M697, so that I could actually see what the rear of the engine looked like and if I had any old gasket remaining.
Image
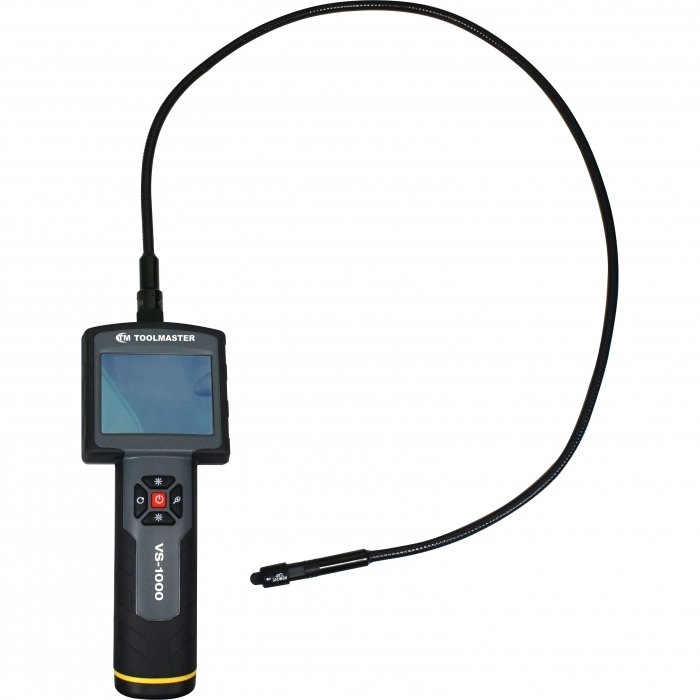
The resolution isn't great, it's not bright enough and the unflexible camera at the tip of the flexible is too long so was nearly impossibly to get angled where I needed it.
The video can be rotated by 90* at a time so it makes it easy to manipulate a tool in your other hand, you can rotate the image so that your hand movements are natural (as opposed to needing to account for the camera's perspective which in this case was 90* from my view).

It was obvious from the inspection camera that there were in fact still patches of the original gasket remaining so over the next few weeknights I worked at removing them.

There were some areas I couldn't see so I popped into SuperCheap and bought this inspection camera:
https://www.supercheapauto.com.au/p/sca-sca-inspection-camera-4.3/563867.html
Image
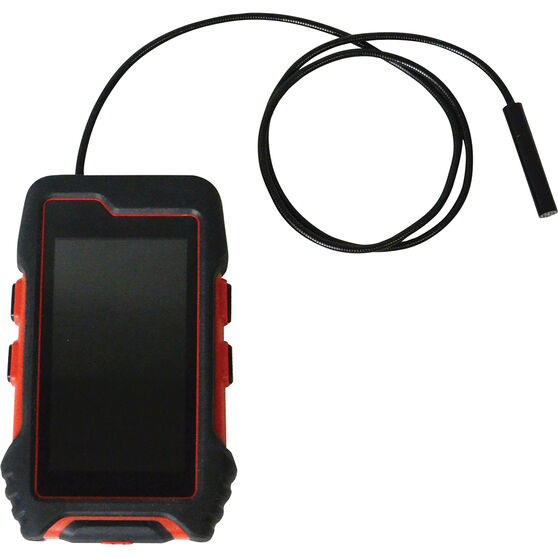
This one has a bigger and brighter display and the cable is more flexible so the camera can get into places the previous one can't.
Unfortunately the flexible camera cable isn't firm enough and if the camera or cable bumps anything, the camera gets re-oriented far too easily.
A cable with flexibility between this one and the previous one would be ideal.
This camera only allows 180* rotation so it's easier to get the camera aiming at what you need, find a firm resting place for the unit and orient the unit so that it makes manipulating your other tool more natural.
Because the camera is so small and the cable is very flexible, I was only just able to see the entire circumference at the rear of the head and saw a lot of original gasket around the lower stud.

The old gasket was removed over a few weeknights using a combination of razor blades, wet&dry fine-grade paper and a steel-wool scourer and way more patience than I've ever had.
I put a couple of old hard-drive magnets inside the engine to catch any steel wool fragments - worked well.

Other installers reported replacing the QMax-supplied rear bolt with an Allen-key bolt instead because it made it easier/faster to tighten (getting it to start threading is difficult and you can only turn a ring spanner about 1/4 turn at most).
I tried this before final installation (ie. installing the block without the sealant) and shortened the short-leg of an old Allen Key to allow it to fit back there.
Chamfering the Allen key's edges and rounding the corners slightly made it MUCH easier to insert the key and tighten the bolt.
I also chamfered the tip of the Allen bolt and made sure that it would start threading easily.

This 3rd time, I was able to get the block installed relatively quickly and after installing the rest of the coolant system it hasn't leaked for 24 hours.
Don't worry about dying, worry about not living!
Garage Thread: http://www.mx5cartalk.com/forum/viewtopic.php?f=57&t=76716

The American
Forum Guru
Posts: 1509
Joined: Fri Jun 29, 2012 9:23 pm
Vehicle: NB8B - Turbo
Location: Brisbane, Qld. Previously Perth WA
Contact:

Re: Lokiel's "Gina" (2004 Titanium SE)

Postby The American » Mon Nov 08, 2021 6:21 am

I’m glad I had an excuse to pull the engine out when I fitted mine!

User avatar
greenMachine
Forum Guru
Posts: 3946
Joined: Thu Apr 24, 2003 11:00 am
Vehicle: NB SE
Location: Sports car paradise - Canberra
Contact:

Re: Lokiel's "Gina" (2004 Titanium SE)

Postby greenMachine » Mon Nov 08, 2021 8:39 am

Thanks Lokiel, as ever a mine of useful advice and information. Especially the tip on cutting :mrgreen: down the allen key!

:mrgreen:
I never met a horsepower I didn't like (thanks bwob)

Build thread

NB SE - gone to the dark side (and loving it 8) )

User avatar
Lokiel
Forum legend
Posts: 4126
Joined: Thu May 28, 2009 2:39 pm
Vehicle: NB SE
Location: Brisbania

Re: Lokiel's "Gina" (2004 Titanium SE)

Postby Lokiel » Mon Nov 08, 2021 10:40 am

^
You didn't miss my big tip about using the QMax-supplied sealant did you? :P
Don't worry about dying, worry about not living!
Garage Thread: http://www.mx5cartalk.com/forum/viewtopic.php?f=57&t=76716

User avatar
bruce
Speed Racer
Posts: 7662
Joined: Fri Apr 25, 2003 11:00 am
Vehicle: NA8 - Turbo
Location: Victoria
Contact:

Re: Lokiel's "Gina" (2004 Titanium SE)

Postby bruce » Mon Nov 08, 2021 10:55 am

I thought I head u swearing down here in Melbourne.

User avatar
greenMachine
Forum Guru
Posts: 3946
Joined: Thu Apr 24, 2003 11:00 am
Vehicle: NB SE
Location: Sports car paradise - Canberra
Contact:

Re: Lokiel's "Gina" (2004 Titanium SE)

Postby greenMachine » Mon Nov 08, 2021 12:18 pm

Lokiel wrote:^
You didn't miss my big tip about using the QMax-supplied sealant did you? :P


It is engraved on my forehead :lol: :shock:

:mrgreen:
I never met a horsepower I didn't like (thanks bwob)

Build thread

NB SE - gone to the dark side (and loving it 8) )

User avatar
Lokiel
Forum legend
Posts: 4126
Joined: Thu May 28, 2009 2:39 pm
Vehicle: NB SE
Location: Brisbania

Re: Lokiel's "Gina" (2004 Titanium SE)

Postby Lokiel » Sun May 22, 2022 11:37 pm

After seeing ManiacLachy's DIY door cards I decided I'd do them "one day" to give me more room so ordered the Primer 3d panels, a spare set of NB door cards (I don't like the NA ones people use to finish the top section) and cross-stitched-quilted black vinyl cladding from somewhere in "e-Bay China" - sometimes these Chinese orders take up to 3 months so I figured I'd order them in April:
Image

This week the Primer 3D parts arrived so I punched out the holes for a test fit and found 2 problems:
1. I've got JL Audio component speakers so the bloody crossovers in the doors stick out way too much AND
2. The speaker hole in the panel didn't line up with my speaker.
Image

I could have re-mounted the speaker crossover components under the seats but that's a wiring hassle and I've got other things I NEED to do so I did some "Googling" and found a set of full-range (all-in-one speakers) JBL Stadium GTO620 speakers that work well WITHOUT an amplifier.
They're expensive but are perfect for an MX5 IMO since you wont get great sound in an MX5 with the top down anyway, bass is OK and I can "add lightness" by removing the crossover components from the doors and removing the amplifier in the car (plus all the extra wiring).

The spare NB8B/C door cards and vinyl panels arrived this week so I decided to fit at least one this weekend.

Image

Image
Image
Image
Image
Note: Originally I left glue tabs on the door lock hole but because of the foam in my door cladding I kept having to cut it back further to get the cup aligned correctly so I just cut the padding flush with the hole. The door lock cup has a lip on it and I have an extra chrome "bling" rim that adds more lip to hold the cladding down.
When I did the driver-side door I only cut half as many tabs for the speaker hole as the passenger-side.
This made the driver-side speaker cover a VERY tight fit.
Hopefully the extra tabs make the passenger-side easier to fit the speaker cover.

A layout of the how the new door card would look:
Image
Image
Initially I ordered door pull-straps but didn't really like them :(

I did the driver-side door first and found that the existing speaker mounting board needed to be re-made since the new JL Audio speaker is NOT centred in the cut-out.
The speaker cover fits quite firmly in the panel's speaker hole when the panel's clad so I fitted the door card with the speaker cover inside it and drilled its screw holes into the new MDF mount. These new screw holes were used to centre the speaker cut-out in the MDF board and I used a jigsaw to cut a hole for the speaker to sit inside.

I ordered a set of IL Motorsports door pulls which I liked better.
You need to swap the 2x angled OEM doorscrew grommets with flat ones (remove using platic door trim tools and LOTS of force).
Image
The primer 3d doorcards include 6x of these grommets, 2x for door pulls and 4x for vertical rear panels so 2x more are needed for the IL Motorsport door pulls.
Champion Part No TF36 screw grommets from Autobarn/SuperCheap work well here (they come in a 6x pack).

The 2x screw holes didn't line up with the panel cut-outs so I used masking tape on the back side of the panel, stuck a couple of pop-rivets in the grommet holes and re-fitted the panels, pushing them hard into the pop-rivets so they'd cut into the tape to mark the required holes.
I carefully used a Dremel with a carbide bit to cut the new screw holes into the panel, making sure NOT to tear into the panel cladding.
The lower grommet is very recessed in the door so I used the MDF "wheel" created to start the jigsaw cut for the speaker hole as a spacer - this now provides an additional fastening point for the centre of the panel to the door.

Image
Image
Image
- bloody sawdust from the MDF gets EVERYWHERE!

To fill the gaps under the top door trim I'm using Sikaflex "foam in a can" and plan to sand it back flush and re-clad the vinyl trim.
First I built a "wall" to stop the foam getting into the OEM's clips.
Image
Image

This stuff takes a while to set, probably longer than normal due to Brisbane's current humidity so I worked on the passenger side door in the meantime.

Once dry, the foam is quite dense and ready for cutting/sanding:
Image
Image

After MUCH cutting with the bread knife, I'm now ready for sanding (this week's job, followed by re-cladding the top vinyly section):
Image
This took a LONG time :(
Don't worry about dying, worry about not living!
Garage Thread: http://www.mx5cartalk.com/forum/viewtopic.php?f=57&t=76716

User avatar
ManiacLachy
Forum Guru
Posts: 3235
Joined: Mon Jan 13, 2014 2:35 pm
Vehicle: NB SE
Location: Brisbane

Re: Lokiel's "Gina" (2004 Titanium SE)

Postby ManiacLachy » Mon May 23, 2022 9:10 am

Nice work! I really like the flat door cards, and I don't miss the elbow rest. I think we worked through many of the same issues and questions, but we came up with slightly different solutions and preferences - which I love!

I put my crossover where your old one went, but had to make the bracket to sink inwards, it was a balancing act between staying clear of the glass window when down and not pressing out the door card.

I also have a set of those door straps, I even mounted a nutsert in the door so I could attach them, but ran my loop pulls first to see how I liked them. That way I wouldn't have a hole I didn't need if I only wanted the loops. So far I'm happy with the loops.

I considered the NB uppers, but couldn't work out a solution for the gap fill. I like what you've done and I'm keen to see the finished result. In my mind it seems like the hump will be too large for the proportions of the door. I could be wrong though. While I like my NA uppers, they don't quite match the dash, so I'll be following your final look on this!

I'm interested in some of those spacers for the bottom of the door!

User avatar
Lokiel
Forum legend
Posts: 4126
Joined: Thu May 28, 2009 2:39 pm
Vehicle: NB SE
Location: Brisbania

Re: Lokiel's "Gina" (2004 Titanium SE)

Postby Lokiel » Mon May 23, 2022 9:48 pm

Tonight I finished trimming the driver-side foam...
Image

... and clad it in leather-look vinyl wrap:
Image
Image

I'm going to need to redo the vinyl cladding because the lower underside tabs weren't long enough in places - the vinyl doesn't stick to the lower foam at all so I'll need longer tabs and will need to used Sikaflex to glue them together.

I'm happy with the look though.
Don't worry about dying, worry about not living!
Garage Thread: http://www.mx5cartalk.com/forum/viewtopic.php?f=57&t=76716

User avatar
bruce
Speed Racer
Posts: 7662
Joined: Fri Apr 25, 2003 11:00 am
Vehicle: NA8 - Turbo
Location: Victoria
Contact:

Re: Lokiel's "Gina" (2004 Titanium SE)

Postby bruce » Tue May 24, 2022 9:31 am

Looks good.
I hate that expanding foam. I wonder if body filler would work?

User avatar
Lokiel
Forum legend
Posts: 4126
Joined: Thu May 28, 2009 2:39 pm
Vehicle: NB SE
Location: Brisbania

Re: Lokiel's "Gina" (2004 Titanium SE)

Postby Lokiel » Tue May 24, 2022 11:32 pm

The trimmed OEM upper door card didn't look quite right to me so I trimmed the bottom left even further and re-clad it in leather-look vinyl, making sure that the bottom side tabs were long enough to wrap over top of the rear foam and onto the OEM doorcard's particle-board backing:

Image
- looks better IMO, not so bulky and less curves made cladding it with vinyl easier.

I still had to use Sikaflex glue on the foam since the vinyl would not stick to it and it barely held on the particle-board.

I'm very impressed with the "stickability" of the foam to the particle board, despite long hacking with the bread knife and shaving with a bastard file, none of it broke free from the OEM doorcard. I had expected it to break off and would need re-gluing using craft glue but not so..
Don't worry about dying, worry about not living!
Garage Thread: http://www.mx5cartalk.com/forum/viewtopic.php?f=57&t=76716

User avatar
Okibi
Speed Racer
Posts: 10882
Joined: Thu Aug 21, 2003 11:00 am
Vehicle: NB SE
Location: Perth, Western Australia
Contact:

Re: Lokiel's "Gina" (2004 Titanium SE)

Postby Okibi » Wed Jun 08, 2022 2:50 pm

Looks awesome. :mrgreen:
If you had access to a car like this, would you take it back right away? Neither would I.

User avatar
Lokiel
Forum legend
Posts: 4126
Joined: Thu May 28, 2009 2:39 pm
Vehicle: NB SE
Location: Brisbania

Re: Lokiel's "Gina" (2004 Titanium SE)

Postby Lokiel » Mon Aug 08, 2022 9:21 pm

One of the issues with the Primer3D aftermarket DIY door panels is that the bottom 3x OEM doorclips and front+middle clip no longer "work" because the gaps are too big between the doorcard and door.

"No worries" I thought, I've got a 3D printer and can make some of my own with the depth required, plenty of people have made their own door clips.

The top flexible pin that locks into the door is the biggest issue, it needs to be flexible enough to compress without breaking and strong enough to hold the clip in place when it's slotted in place.
PLA and ABS 3D filament are too brittle for this so I use PETG filament - Nylon filament would be better but I haven't had much success with it in the past.
I tried about 10 different versions of the top flexible pin, but none of them survived 2 or 3 insertion/removal cycles into the door without breaking the top pin (or bits of it) so this wasn't a long-term solution:
Image
Image
FYI: The shallow bottom cone is needed for the 3D print so that the slicer does not add supports which need to be cut-out/trimmed later since the print must be done from the base up (I don't have multiple filaments on my printer so can't use a soluble filament for supports).

I needed to re-use the OEM door clips, or aftermarket ones, they're made of nylon so their flexible tips will never snap.

I tweaked my initial doorclip design so that the nylon door clips could "lock into" my doorclip spacers.

Image
Image
Image

The nylon door clips slide into my spacers, they're held vertically in place because my spacers provide a lip around the entire base of the OEM nylon door-clip and have a nipple in the centre that inserts into the hole at the base of the nylon door clip, and are held in place horizontally because the spacers have a lip that holds 50% of the base of the doorclip.

Image
Image
Unfortunately you can't use an OEM doorclip with a spacer designed for an Aftermarket doorclip, and vice-versa, because their base diameters are different (which can be seen in the photo above) so there are different 3D models for both.

I made quite a few sizes (in terms of depth) and these are the following ones I used:
Image
FYI: The numbers quoted above refer to the depth from the top of the shallow cone to the base that the doorclip sits on (it does not include the lip).

This solution holds well. When removing the doorcards, the OEM clip will either pull out of the door, or the base of the door clip will pull out of my spacer with no breakage so they can be put back together.

I'll publish these on one of the 3D model sites for those that want them (ManiacLachy, I've got your set printed already because you "bagsed" them in one of the above posts).

Note: It's recommended to print these one at a time rather than all at once (unless you've got your 3D printer set up well), otherwise you'll be doing lots of "strand trimming".

... more stuff coming, just need time to complete some of the tasks remaining.
Don't worry about dying, worry about not living!
Garage Thread: http://www.mx5cartalk.com/forum/viewtopic.php?f=57&t=76716

User avatar
Lokiel
Forum legend
Posts: 4126
Joined: Thu May 28, 2009 2:39 pm
Vehicle: NB SE
Location: Brisbania

Re: Lokiel's "Gina" (2004 Titanium SE)

Postby Lokiel » Mon Aug 08, 2022 10:50 pm

Don't worry about dying, worry about not living!
Garage Thread: http://www.mx5cartalk.com/forum/viewtopic.php?f=57&t=76716

User avatar
bruce
Speed Racer
Posts: 7662
Joined: Fri Apr 25, 2003 11:00 am
Vehicle: NA8 - Turbo
Location: Victoria
Contact:

Re: Lokiel's "Gina" (2004 Titanium SE)

Postby bruce » Tue Aug 09, 2022 9:12 am

That clip next to the pictured top left clip is near impossible to attach, it slides on (if same as NA).


Return to “MX5 Garage Chat”

Who is online

Users browsing this forum: No registered users and 14 guests