The original rear guides were made of nylon. Over time nylon swells and softens from the lubricant used in the track the guide runs in. Most NA guides have long ago crumbled into powder in the bottom of doors.
Mazda don’t service the guide as a separate part; you have to buy the entire glass assembly. There are a couple of guys in the states making these but with the dollar and shipping it was over $100 landed for a pair.
So I got some made and sell them in kits with the security bit to remove them, here is how you go about replacing them on my NA6.
NA8 and NB are similar differences seem to only be with the door cards and their attachment.
(I thought about shrinking picture size but it’s easier to figure out what bolts I am talking about with the full sized images.)
WARNING: I ramble a lot. There are a lot of words here, you may not need all of them but someone will.
You will need:
New Window Guides
PH2 Philips head screw driver
PH3 Philips head screw driver ( this is for the door pull screws, a PH2 will do the job though.)
T30 Torx drive (I have a multi bit screw driver but a ¼ inch spanner will work with the Torx bit)
10, 12, 14mm Sockets
Ratchet and Extensions (I just used ¼ drive as these bolts don’t need to be torqued with the strength of the Incredible Hulk…)
Needle Nose Pliers
Rags
Cleaning solvent (I used Woolworths finest 91 octane but I'm reckless, lazy and want maximum returns for minimum effort)
Silicone Grease (I ordered a tube of the Honda Shin Etsu Off eBay. It seems to be the most recommended but any silicone grease will do)
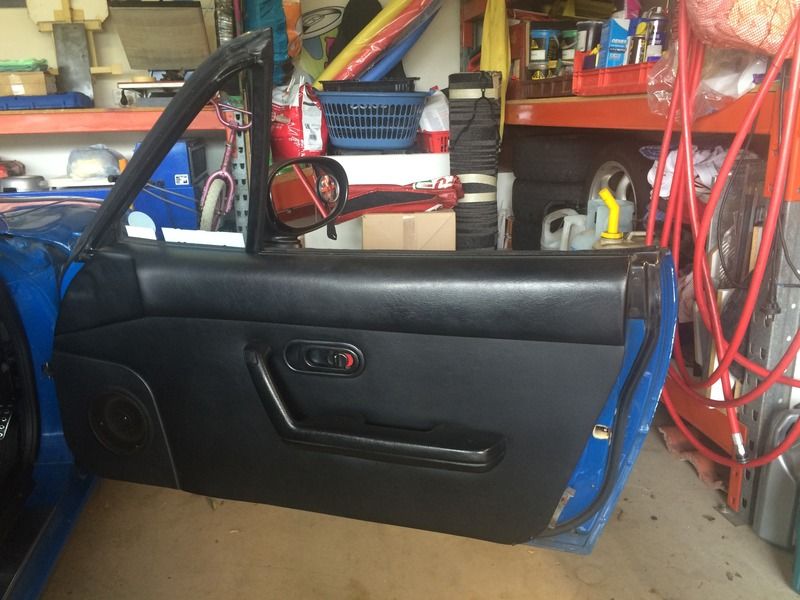
Remove your door cards.
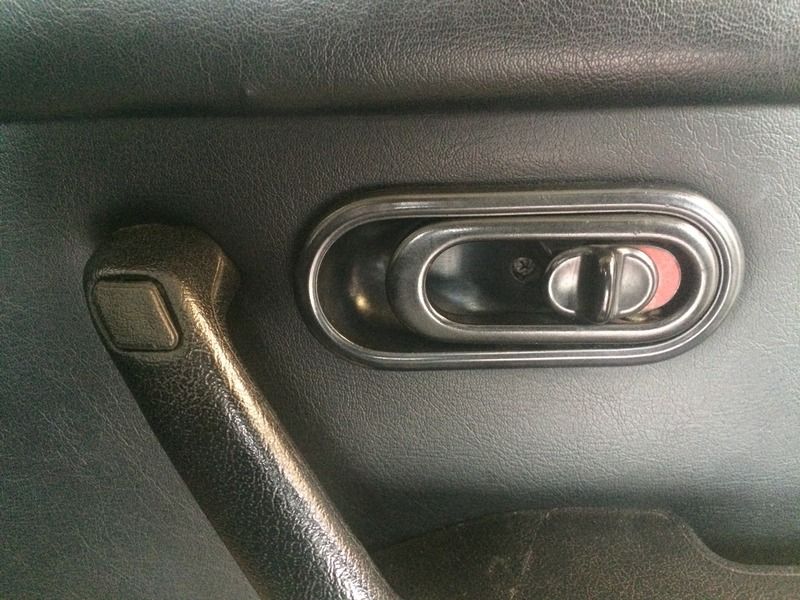
Start by removing the inner door handle cups, they are held in place with one phillips head screw. Pull the handle slightly and slide the cup towards the front of the car to remove.
Pry out the door pull trim plug and remove the screws holding it to the door.
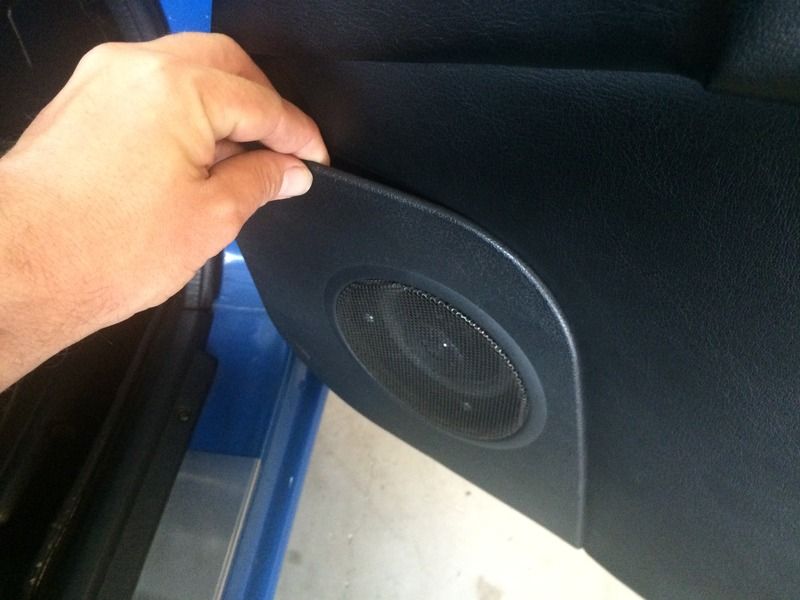
Remove the speaker cover, it is held to the door by 4 plastic clips; one in each corner
Pop the door card clips out of the door. There are special tools for this job but any combination of fingers, flat screwdrivers or steel rulers will do just as well.
There are about 10 clips around the perimeter of the card and plastic door top. Once the clips are free the card will lift straight up and away from the door.
Some clips will probably pull through the old fibreboard of the door card and stay in the door. They can be pried out and refitted to the card.
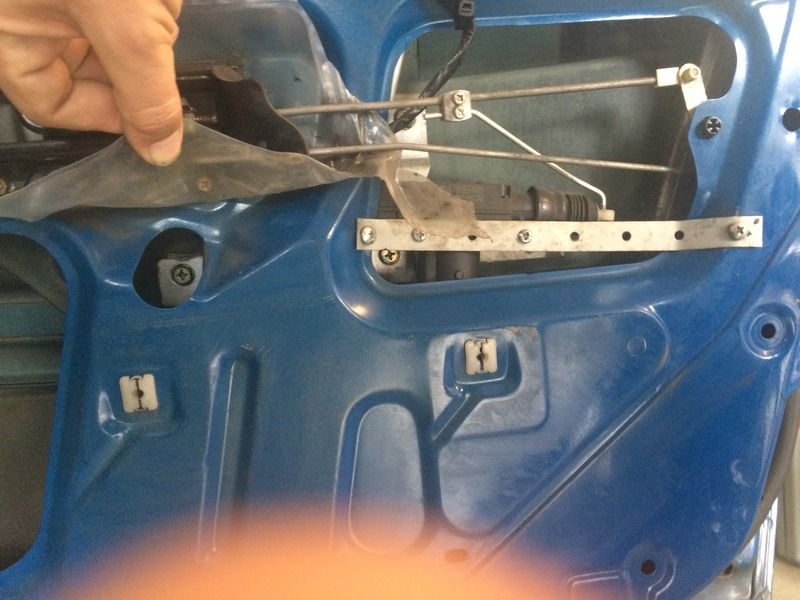
Peel back the vapour barrier and cry at what a filthy overwhelming mess your door is. At this point I grabbed a utility knife and cut the old failed barrier off and threw it in the bin. I cleaned the door down with petrol as it was the fastest cheapest way of dissolving the factory applied butyl mastic.
Brake cleaner, mineral turps or other cleaners will do the same job but I just wanted it done as fast and painlessly as possible. So I donned some gloves, rolled it out into the fresh air and had at it.
If you are lucky enough that your doors haven’t been previously work on by a pack of drunken Chimpanzees you can cleanly remove the factory barrier and re use it. Using a single sided razor blade slowly pull at the barrier and cut the mastic with the blade in a slicing motion. If it’s not ancient and melting off the door you should get a clean cut. Remove the inner door handle from its rods and put the barrier somewhere out of the way it can’t stick to anything.
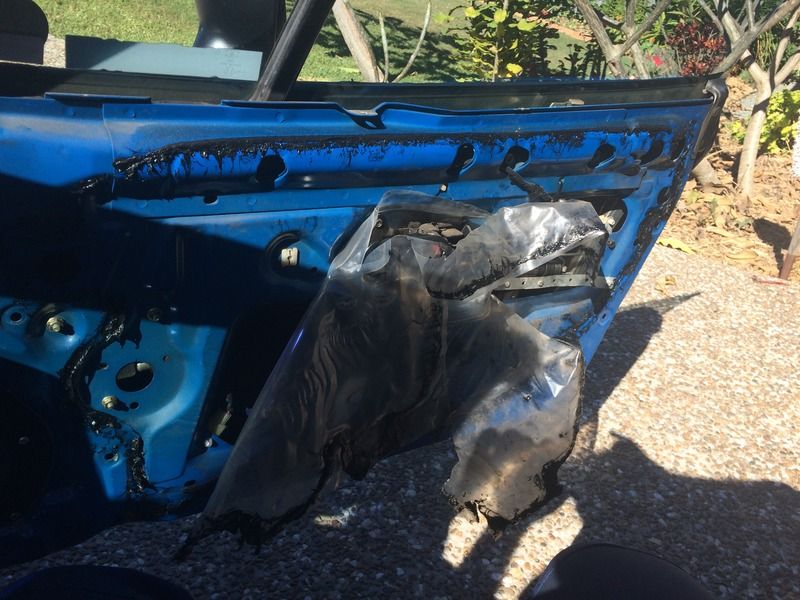
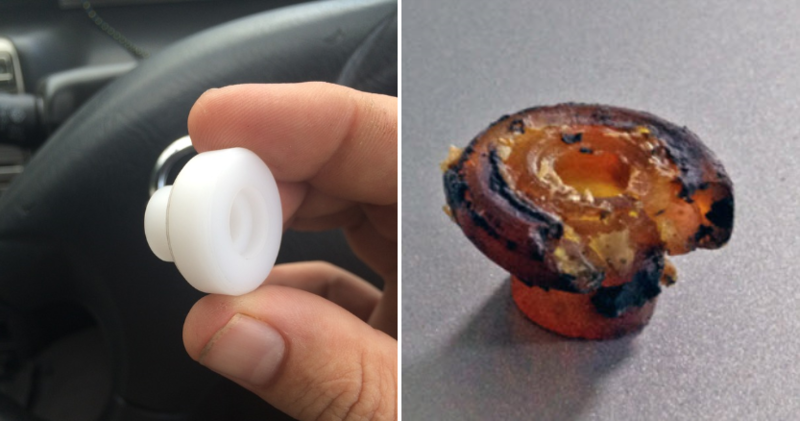
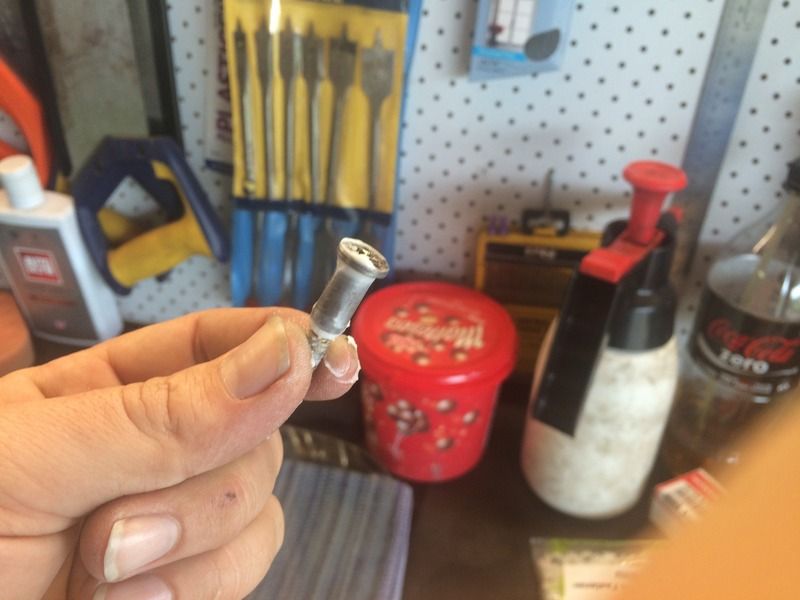
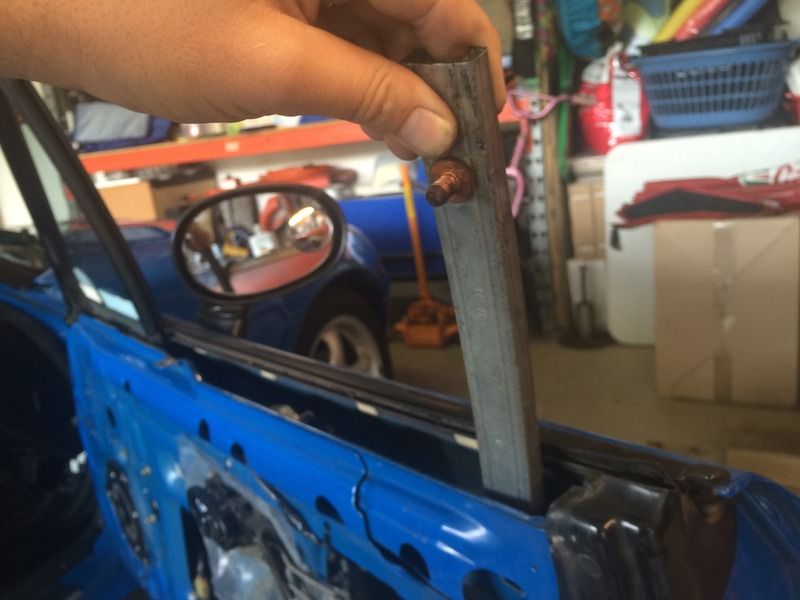
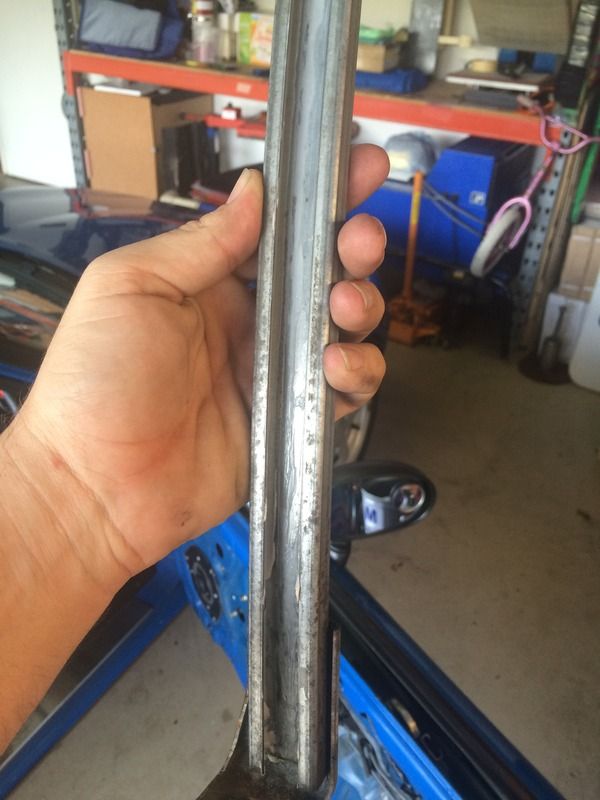
Here is what was left of my original window guides…
The guide was long gone and the bolt rattling around in the channel was the source of all of the banging and clanking when I closed my doors and on rough backroads when driving. These were the only symptoms I had that the guides were gone.
Others have reported missing guides have caused water leaks and problems with the door glass pitching either forwards or backwards when operating the window.
Time to remove the door glass.
There are a couple of different ways to do this but to minimise the chance of damaging the belt line moulding along the outside top of the door and to minimise the variables of adjusting the windows angle and stop points when going back together I found this the simplest way.
Lower the window so you can access the window stops bolted to the bottom of the glass. The forward one can be accessed through the lower forward hole I the door and the rear through the upper rear hole.
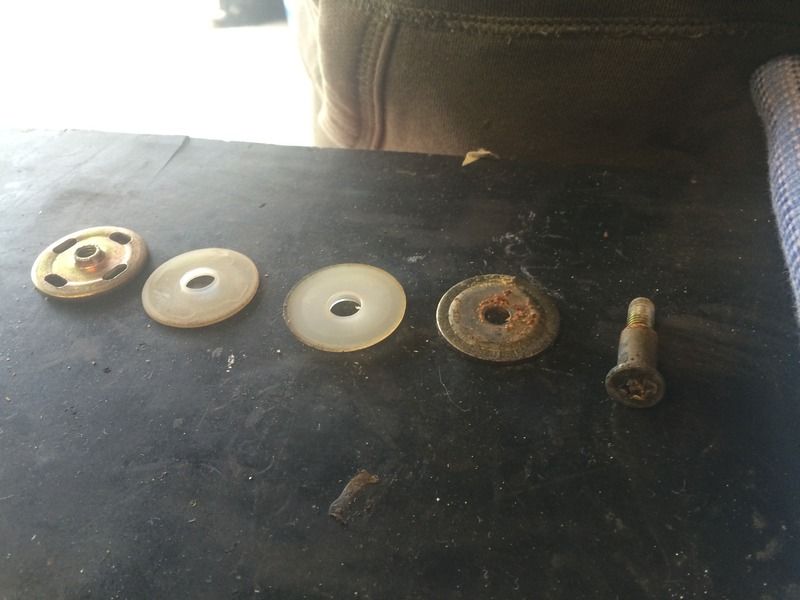
Using a 10mm socket and an extension remove the bolt slowly while supporting the mounting hardware on the back of the glass so it does not drop into the door. In order from the bolt side they stack like this,
Bolt
Stopper
Door Glass
Nylon Washer
Threaded Metal Washer
Loosely assemble in order and put somewhere safe.

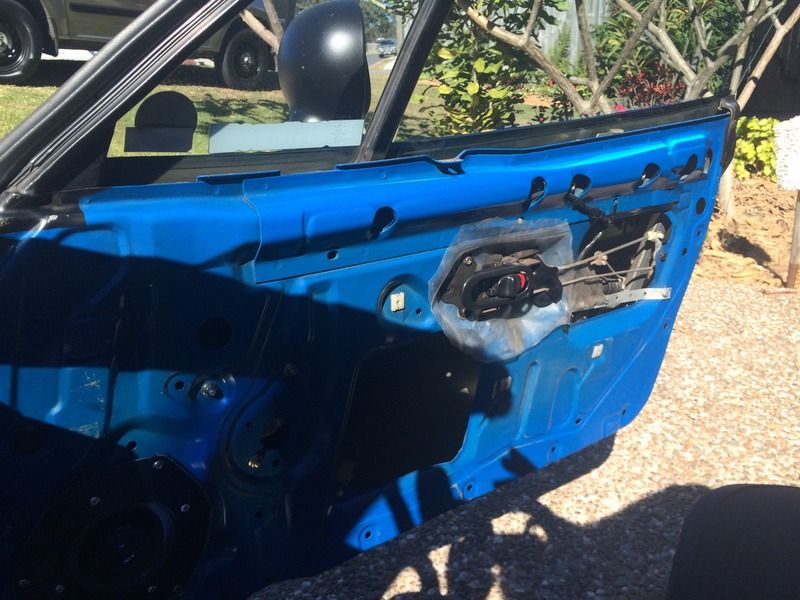
Next raise or lower the glass so you can access all 3 of the 10mm bolts that hold the Glass to the window regulator (They are the bolts with the Philips head cut in them also). My rear ones were buried behind the central locking actuator but still easy enough to remove.
The glass is now free and just hanging from the bracket on the regulator by the hooks on the top of those glass clips. Stand on the inside of the door, grab the glass at the top and lift it a few inches while rotating it to the rear of the door. This will free it from the front channel.
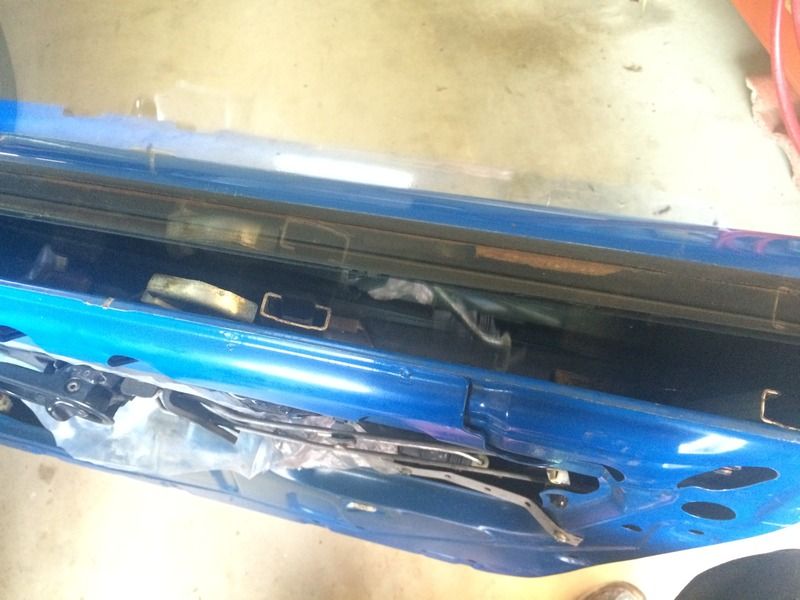
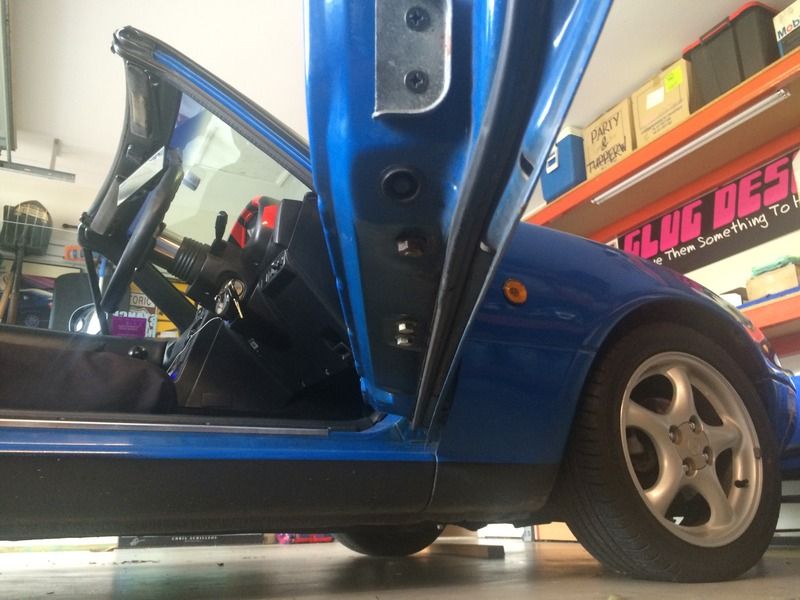
Keep lifting and watching the glass wiper seal in the beltline moulding to make sure the Window Guide Bolt and the Glass Retainer Clips don’t damage it on the way past. I don’t have a photo to demonstrate it but you can fold an opened out cereal box or beer carton in half and slide it between the seal and the glass to protect it.
I didn’t care, as you can see in the photo below my beltline moulding is FUBAR. If you are doing all door related repairs on one day now is the time to reef off these trims. It gives you mountains of room to remove/refit the glass and with them gone you can’t damage them.
Guide replacement and more cleaning.
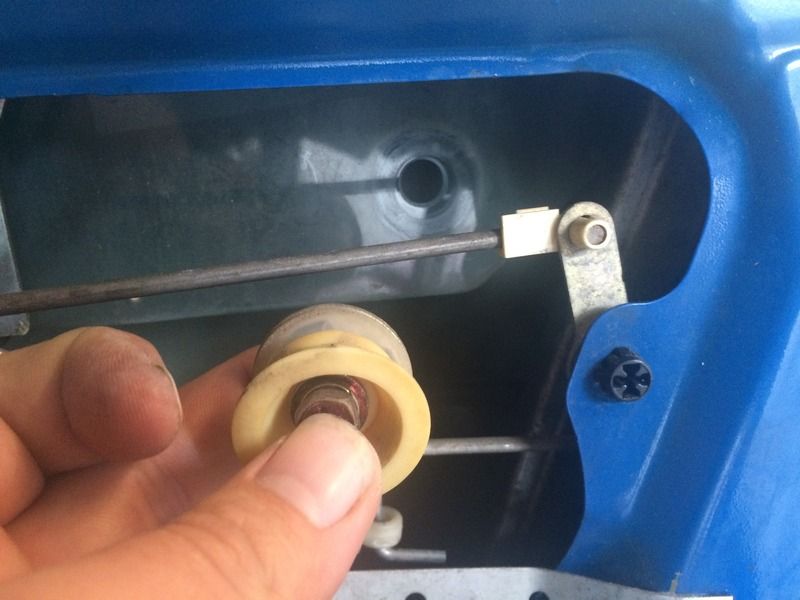
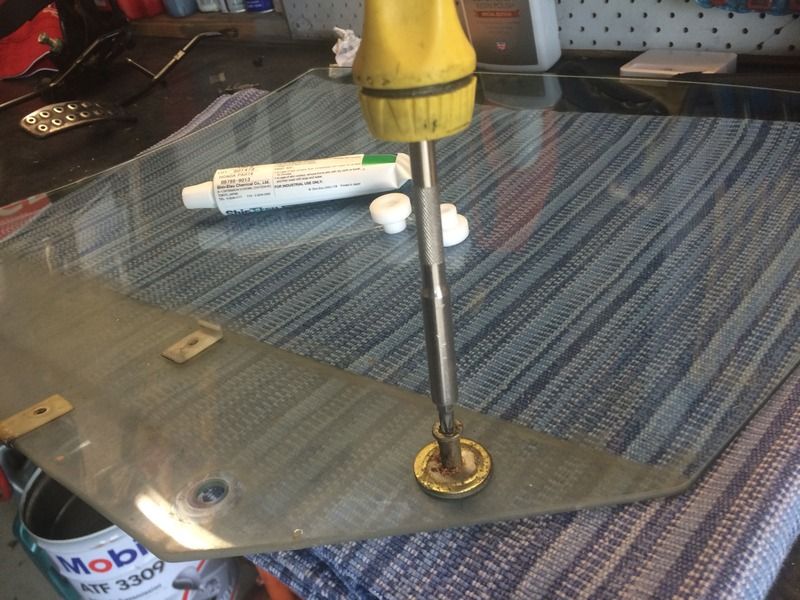
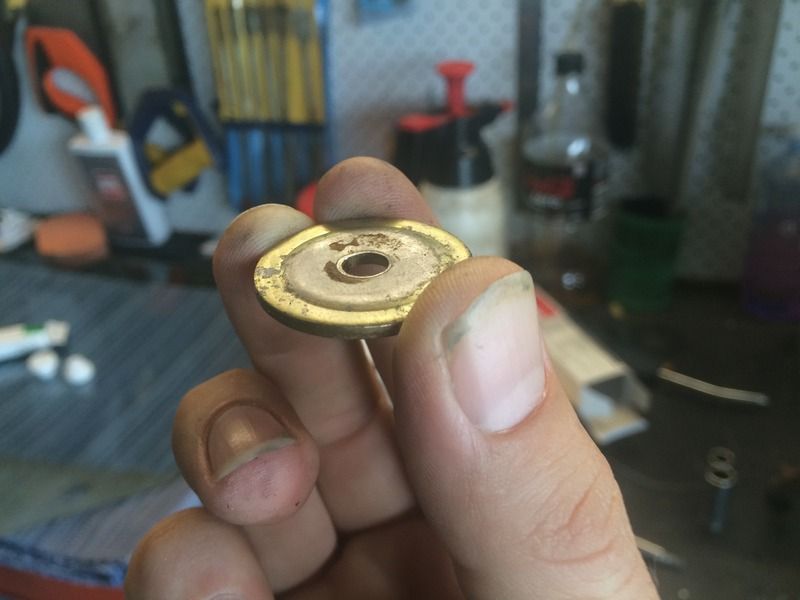
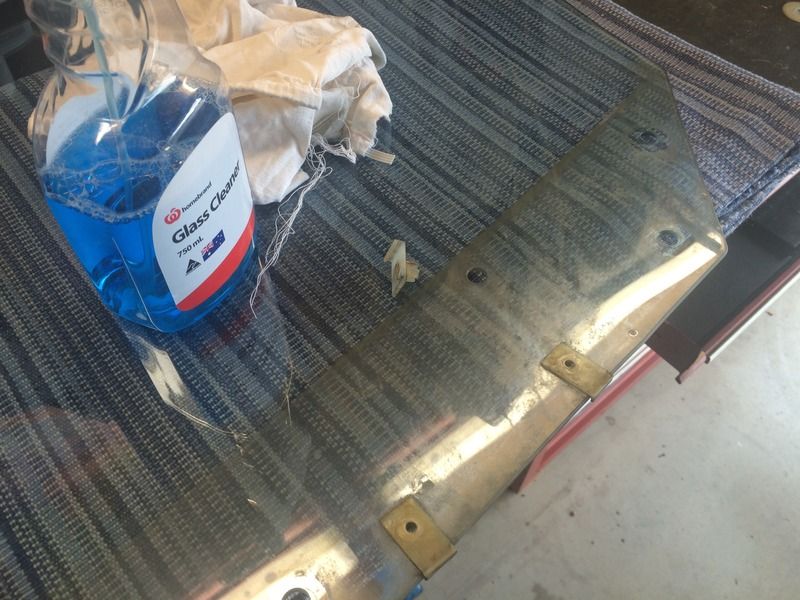
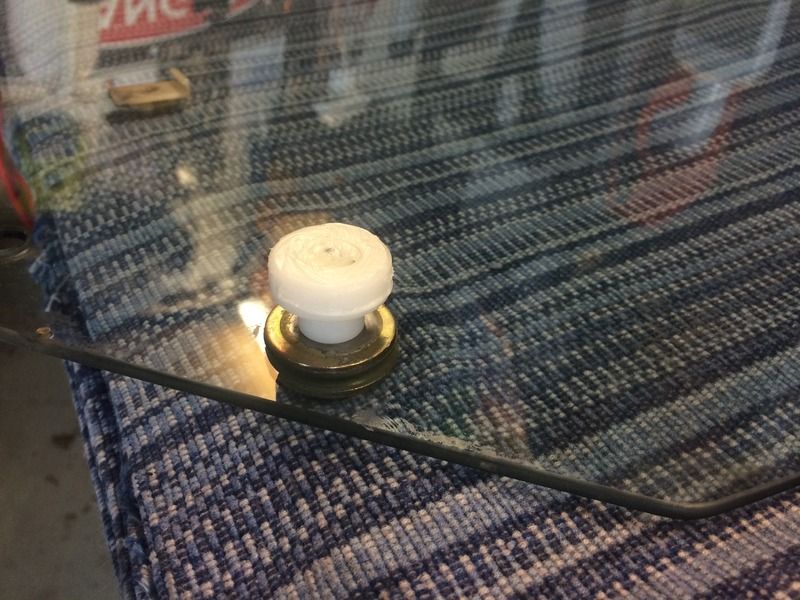
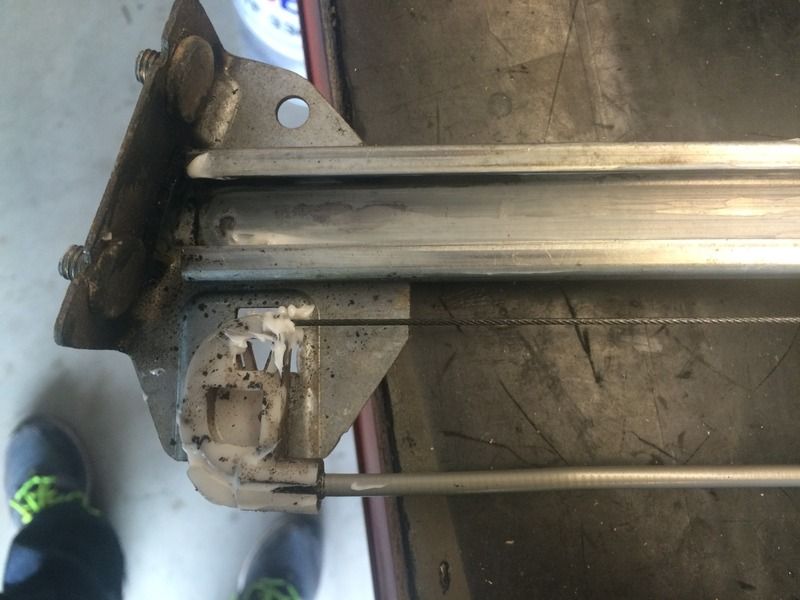
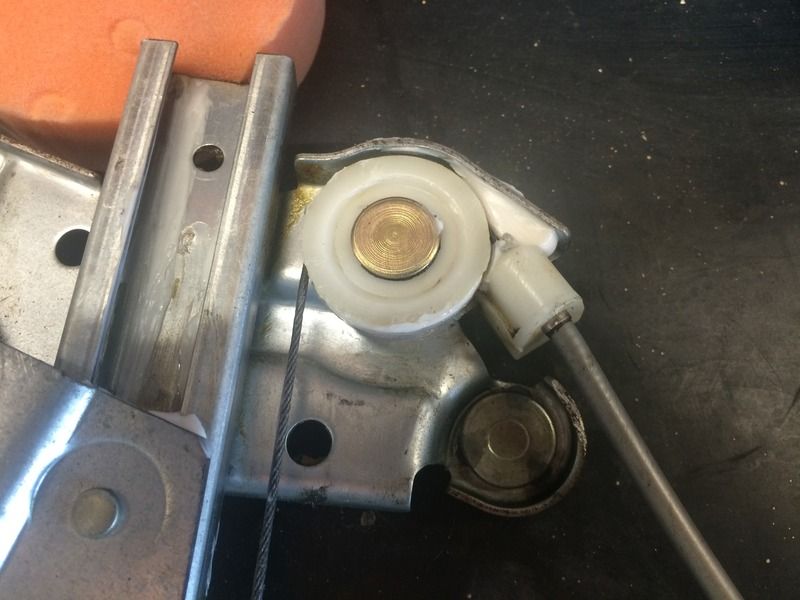
Lay out an old towel or a few layers of rags on your work surface and lay the glass down “Inside UP”. Using the T30 Torx bit remove the Window Guide Bolt from the glass. It is held in place the same way as the Window Stops the nylon washers have dowels on them to locate them firmly in the glass. Take note of which way each of the washers face. The stub on the nut washer faces into the glass. Lay out the components and give them all a good clean before applying grease to the shaft of the guide bolt and installing the new guide roller.
I also removed the glass clips and gave the window a really good clean while it was out. The grime on the section that lives in the door was thick. Make sure you take note of which clip goes where and on what side of the glass!
The guide spins on the bolt like a bearing, so when it is bolted back onto the glass you will notice a very small amount of up and down movement on the bolt but trust me it is not enough to let the window still rattle when back in the door.
Give the guide a coat of grease and then it’s time to focus on the door.
Head back to the car and tear some more stuff out of the door and clean it.
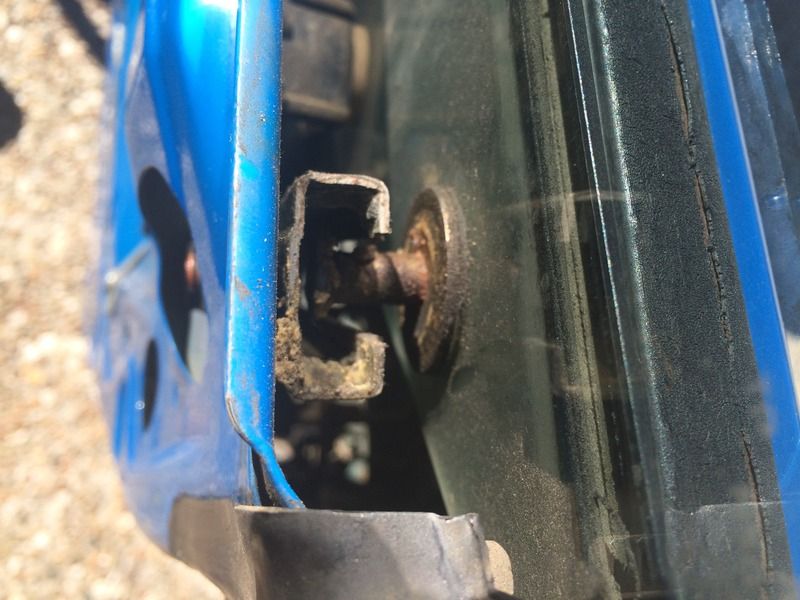
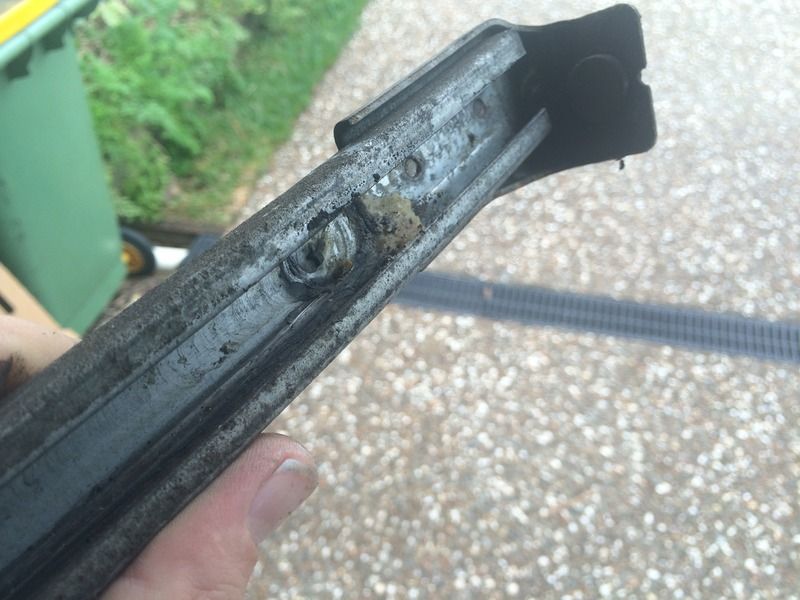
The C channel race that the guide runs in will be caked with dried failed old grease. You can attempt to clean it in situ but will probably only get half of the gunge out of it or slice yourself to pieces on all the raw edges in there.
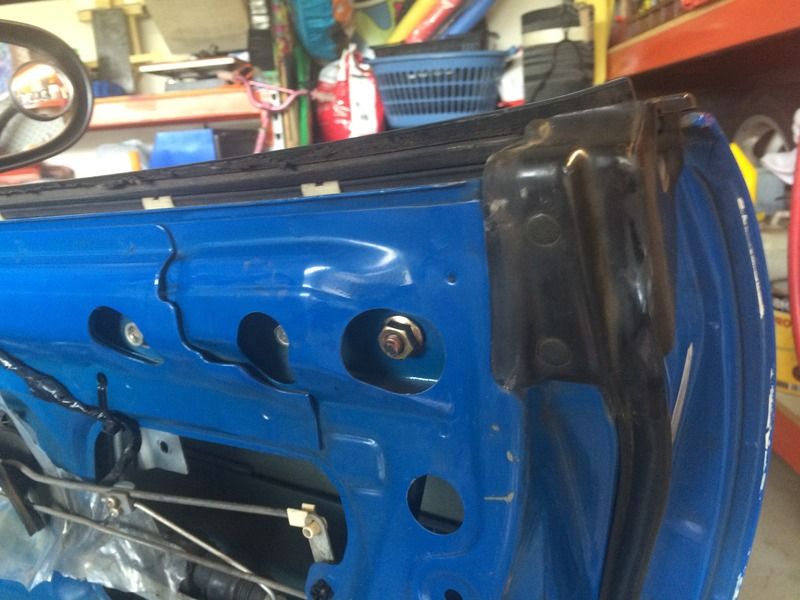
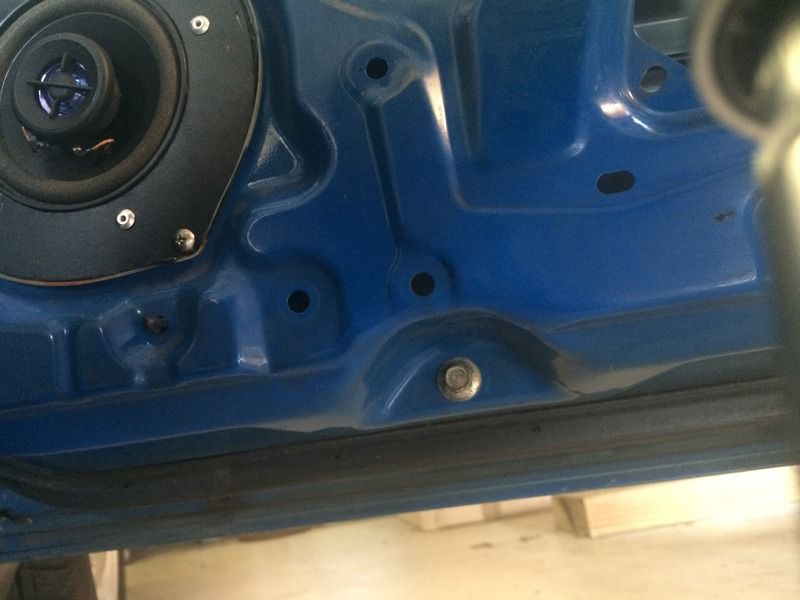
Two bolts has the channel out of the door.
If you suspect the channel has never been removed before or adjusted to compensate for a worn or missing Guide you can grab a fine point marker and trace around the nuts. Reassembly is made easier and this will virtually remove the need to realign the window glass or give you a VERY good starting point to work from if you do..
The 14mm in the centre of the top photo and the rear most bolt on the bottom of the door in the second photo. Remove those and you can remove the channel
It can’t easily make it out the top of the door the gap isn’t quite wide enough for the bottom bracket. It’s much simpler to drop it into the door and pull it out through the inspection holes.
With the channel out it’s time for more cleaning. Grab your rags and solvent of choice and go for gold.
Apply a thin coat of grease to all internal surfaces of the channel. Again, you don’t have to flood it. Most will just get pushed back out by the guide if you go crazy with the grease.
At this point you can either throw it all back together and call it a day or you can go the extra mile and speed up those windows even more.
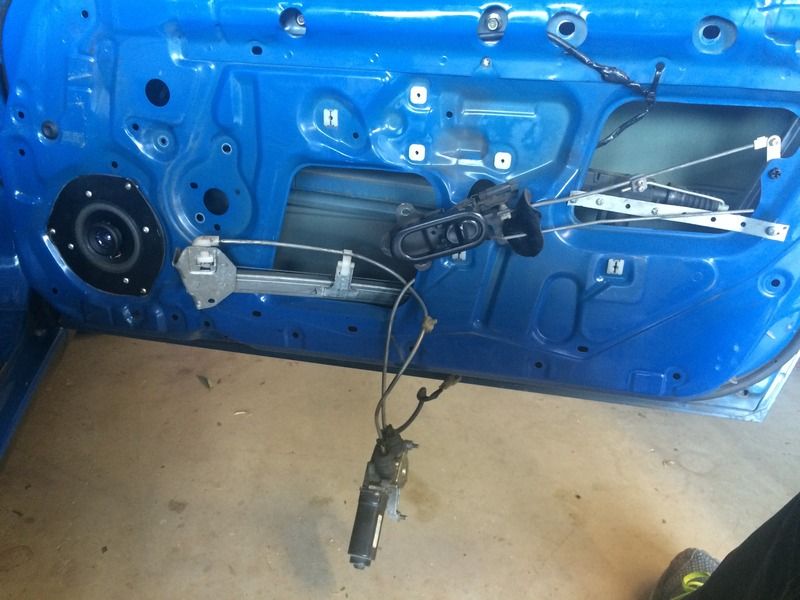
Removing the Window Regulator from the Door
First release the cables from the clips that hold them to the inside of the door. I popped the cable out of the top clip leaving it in place but found it easier to remove the bottom clip still attached to the cable. You will understand once your arm is inside the door, follow the cables and you’ll find the clips.

Unplug the motor and remove the three bolts that hold it to the door. Remove the bolt that holds the front glass channel to the bottom of the door. You will need this free so you can fit the motor out between the front channel and the inner door skin.
Remember which side and orientation you pull everything from as it has to go back in there and not interfere with the glass movement.
Unbolt the regulator from the door, there are four 12mm bolts two under the door at the base of the channel and two at the top the rear most 12mm bolts.
With it all loose you can slide the bottom of the reg towards the front of the door and turn it horizontal, pop the motor out through the inspection hole and slide the reg towards the back of the door. Now you can angle the bottom of the reg out of the door and remove the whole assembly.
Regulator Overhaul
With the Regulator assembly sitting on the bench clean and lightly grease the cable guides and the lifter channel assembly.
Head back over to the car and plug the reg in to the harness without putting the whole thing back in the door.
Either ask someone you trust to help with the next step or have a go yourself. (Choose wisely who you ask to help… Preferably someone who won’t think it would be hilarious to see you bleeding like a tap or scraping around under the car trying to find the end of your finger.)
CAREFULLY operate the reg fully up and down a couple of times with the cable running through a solvent soaked rag. Then CAREFULLY run the cable through a grease soaked rag. BE CAREFUL as this thing has no feelings and will just keep going if your fingers are in its way.
Unplug it again and back on the bench put a dob of grease into both of the cable guides and try to smear some into the wheel at the top.
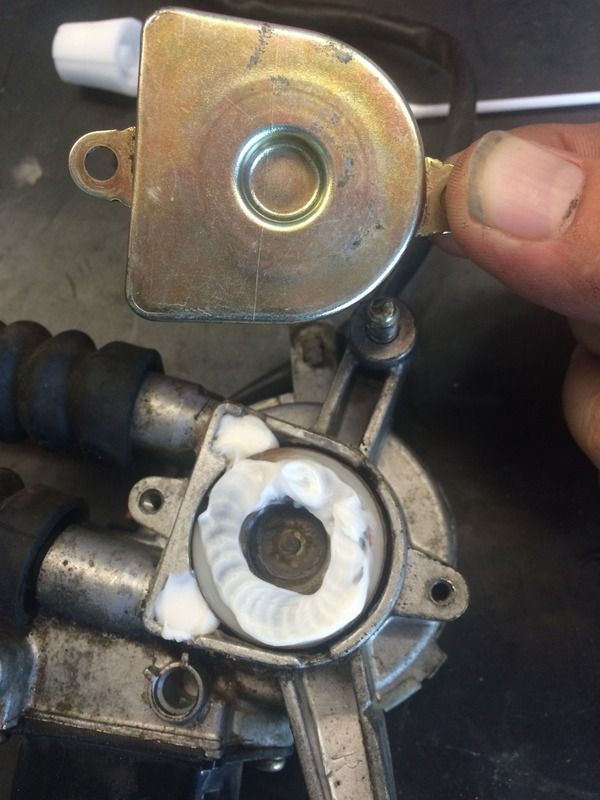
Lastly. Remove the cover from the cable drum on the motor and pump a bit into the housing and smear a bit on the face of the drum where it touches the cover.
This will make your windows glide like butter.
Time to put it all back where it came from.
Work back through this guide until everything is back in the door and LIGHTLY tensioned into place.
Pressure points:
Getting the glass with the new guide back into the door can be a real bitch especially if your windows are tinted.
Remember the cardboard trick from above to save mutilating the Beltline Moulding.
If there is too much going on try removing the 3 glass clips. Then you can just focus on getting the glass and guide through the opening. The hooked clip goes at the top.
Wipe a bit of silicone grease on the little rubber lip at the top of the front glass channel. It stretches but can tear if you’re not careful. Same goes for the rubber at the rear of the door opening.
Really think about how tight the three bolts need to be to hold the glass to the regulator. Those clips are OLD plastic so just nip them snug.
Window Aliginment
It’s time to test your alignment. Run the window up and down a couple of times with the door open (and the engine running. You would be surprised how fast the windows will KILL your battery) If it’s binding at all try to figure out where.
If It’s at the top of travel try loosening the Rear guide channel top bolt and operate the window. If there is a change then nip it up with the window up. If it still binds with the channel loose try backing off the top regulator bolts and shifting the reg back half a millimetre and testing it. If it binds at the bottom of travel try working with the 3 bolts along the bottom of the door.
Keep running the windows up and down until everything is smooth and then climb in and shut the door and try it all again with the roof up to make sure the glass is tight against the seals and water can’t get in. If you need the glass to press harder against the seals loosen the two reg bolts under the door and push them closer to the outside of the door before retightening them. If the glass is too tight against the seals and its slowing it down loosen those bolts and pull them towards the inside of the door before tightening again.
I have read the Honda guys rub the Shin Etsu grease into the door rubbers on the S2000’s to keep the windows running properly and the seals in good shape. I gave it a go too and found the glass does run much smoother and it does not leave greasy marks on the glass when rubbed in completely.
Check back over your work, make sure all bolts and screws have been tensioned down and you can put the door card back on.
You’re done for another twenty something years. Go have a beer!


