Thanks, never owned an Alpine before, but figured if they're good enough for Koenigsegg they'll be good enough for me. I think it may be an older model now, or one that's due to be replaced soon as it was on offer, but it fits in well, and good sized buttons for me.
As far as the harness adaptor, that was a Godsend, I don't know why others would bother messing with wires when this makes it a case of simply plug and play, I'd just wish they were more widely available years ago.
The Idiots guide to replacing a stereo in the NB8B
Moderators: timk, Stu, zombie, Andrew, -alex, miata
-
Tallorder
- Driver
- Posts: 53
- Joined: Wed Oct 07, 2009 1:52 pm
- Vehicle: NB8B
- Location: Victoria
-
PurpleDog
- Learner Driver
- Posts: 14
- Joined: Sat Dec 03, 2016 11:50 pm
- Vehicle: NB Roadster
Re: The Idiots guide to replacing a stereo in the NB8B
Although the guide is pretty comprehensive, a lot (read, almost all) of the image links are broken. Any chance of this post being repaired?
Peter
Peter
2004 NB Silver 
-
Tallorder
- Driver
- Posts: 53
- Joined: Wed Oct 07, 2009 1:52 pm
- Vehicle: NB8B
- Location: Victoria
Re: The Idiots guide to replacing a stereo in the NB8B
Unfortunately I couldn't edit my old post but let's see if I can dig out the pics and post again
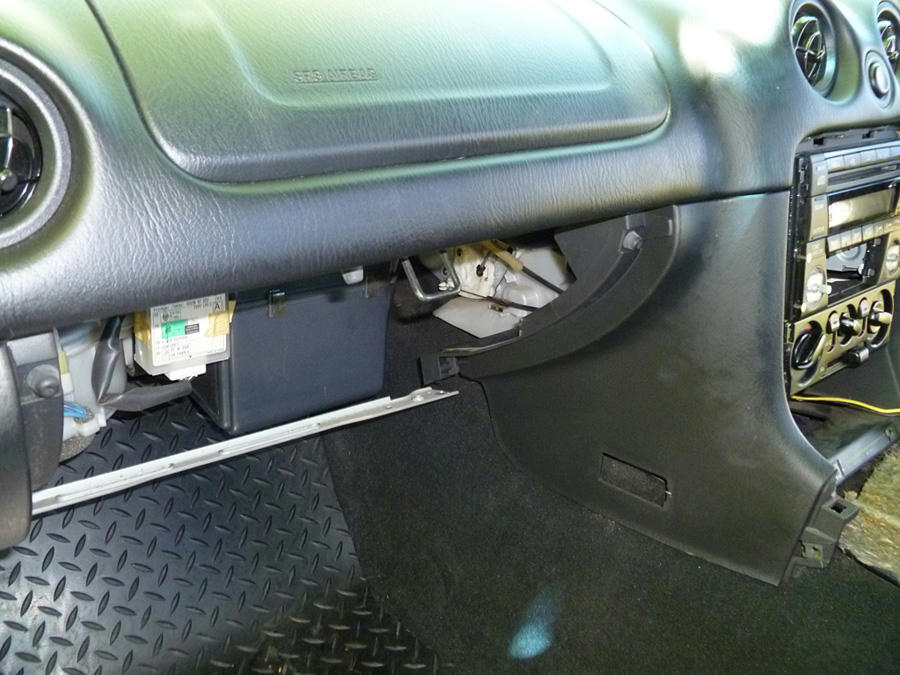
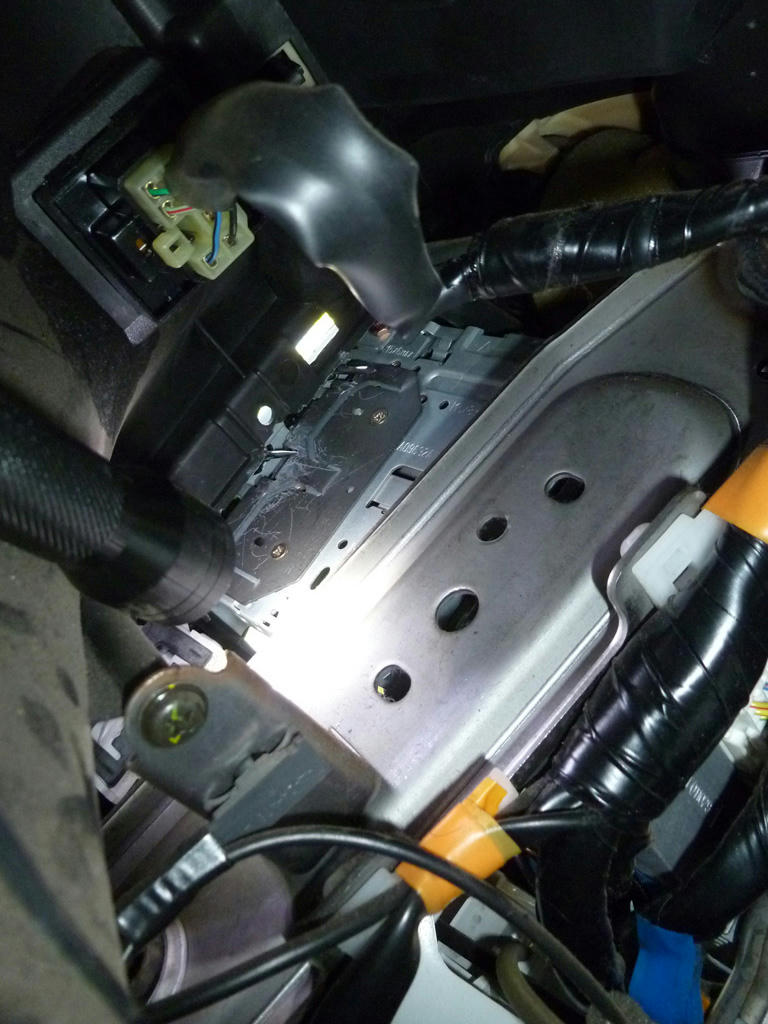
After removing the glovebox by squeezing out the lugs, I could take a look how these damn brackets were hanging on. These things are pretty strong with a good amount of travel keeping them clipped in like springs. Here's the view from the footwell looking out toward the back of the car.
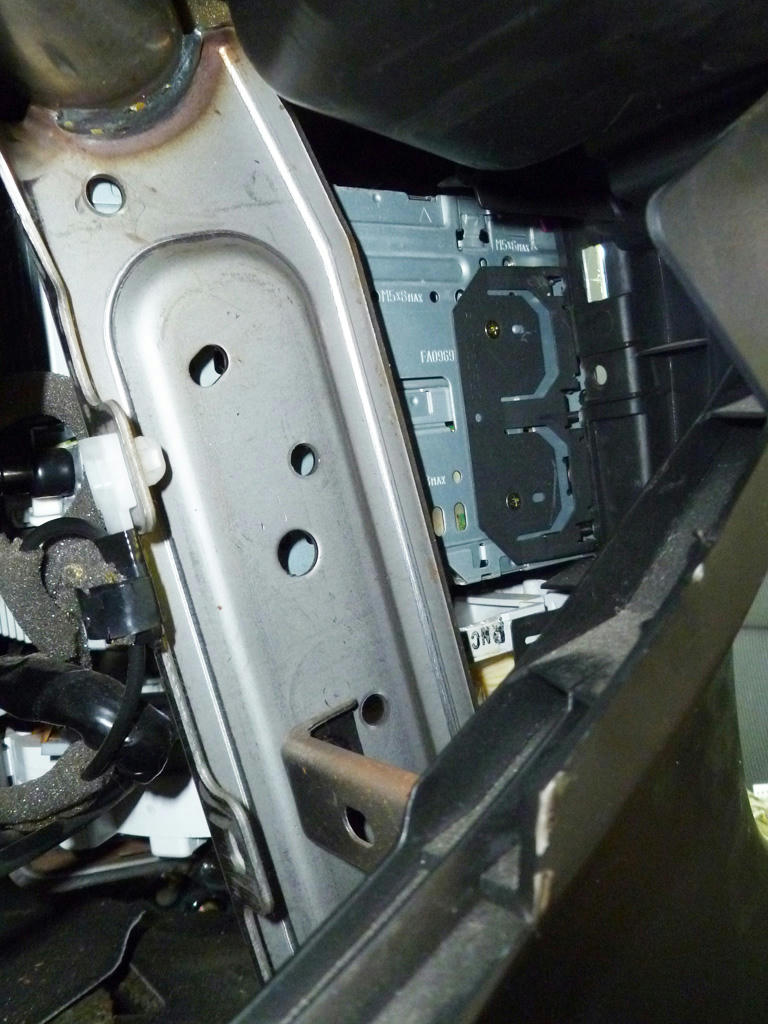
You can see the chunky D-shaped clips screwed to the main body of the factory stereo. When I tried insert awls, or the Din ring removers I could see they were simply sliding in between the clips and the stereo itself, rather than on the outside of the clips, so that you can then push them in to pull them away from the housing. Basically you're normally pulling on the rings outward, which are pivoting against the clips and pushing them inward, unlocking them. Easier said than done when facing the holes from the seats.
In the end I pushed against the clips with a flat headed screwdriver from the footwell, pushing them down and allowing your din removers, awls or in this case nails to slide in on the outside of the clips. Even this was a tight squeeze, and it's just so much easier to slide them in between stereo and clip which you don't want.
Here's the nails all in, the bottom one seemed the toughest to get on the outside.
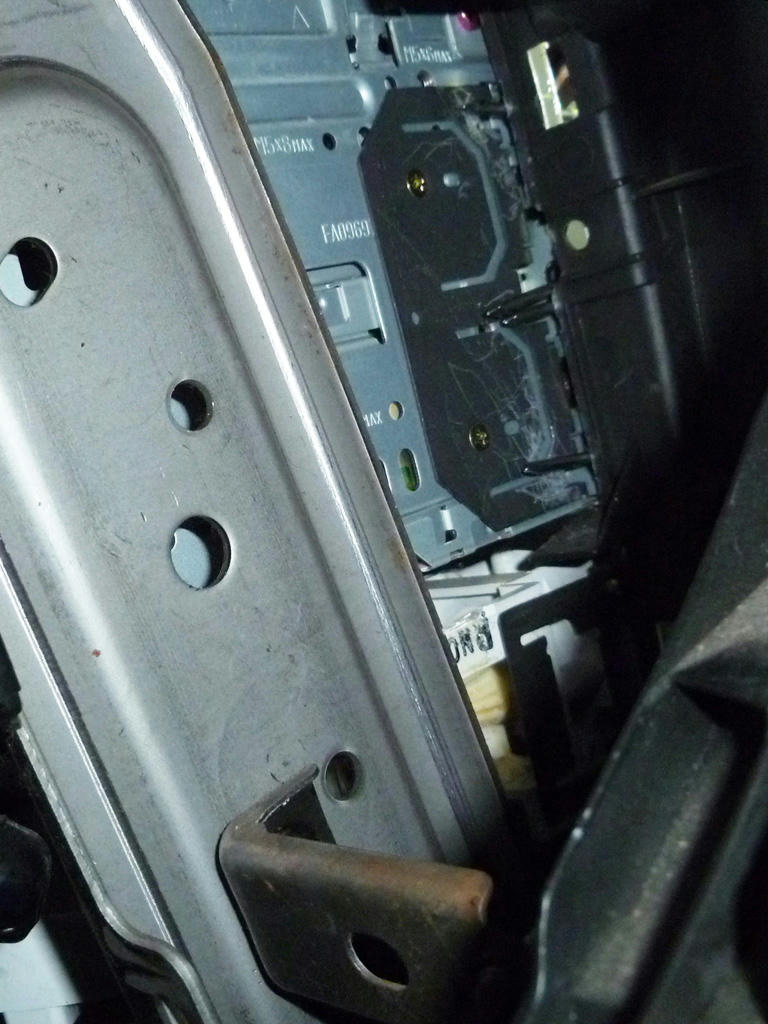
You'll note the scratches left by my screwdriver trying to get leverage.
After that it was the same deal on the other side, though access is even more limited with the steering wheel in the way. I ended up removing the trim piece underneath the wheel, then when I still couldn't quite get my 6' 3"+ frame crammed in, I ended up unbolting the drivers seat, lifting the roof, and giving my neighbours something to laugh about as I contorted into my footwell lying on my back with legs akimbo over the windblocker!
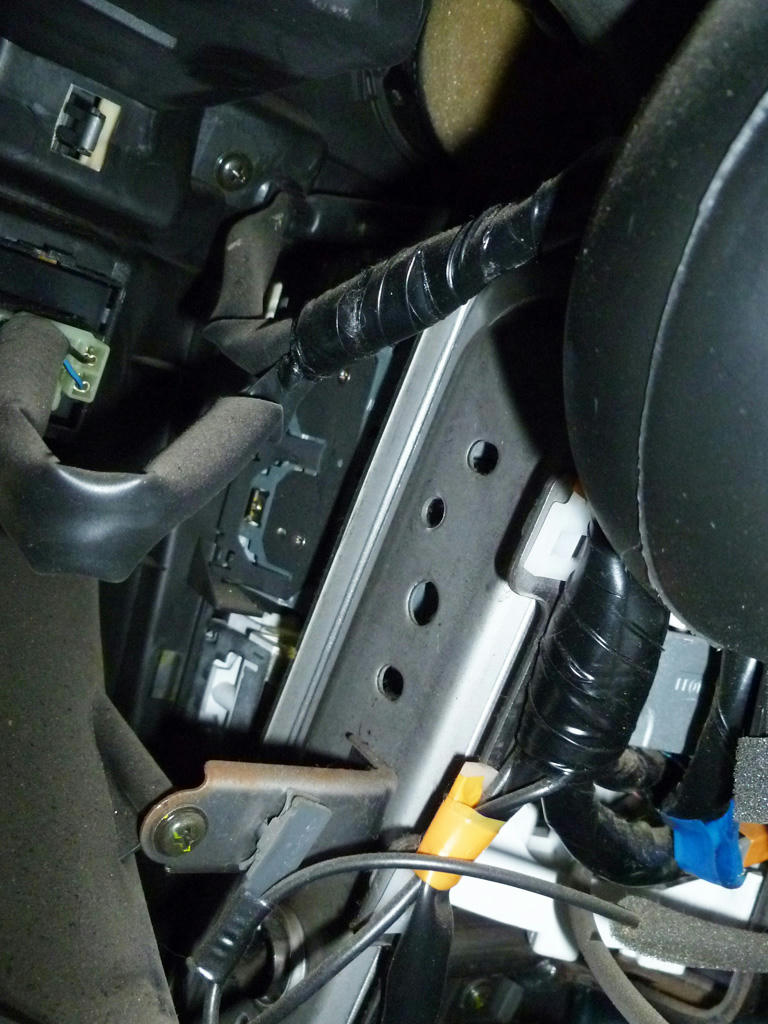
Due to the poor access compared to the passenger side the clip releasing was a lot harder, as it was just a PITA to get any sort of leverage against clips to close them and make room for the nails. However persistence pays off and the unit came loose and lifted out pretty nicely after that.
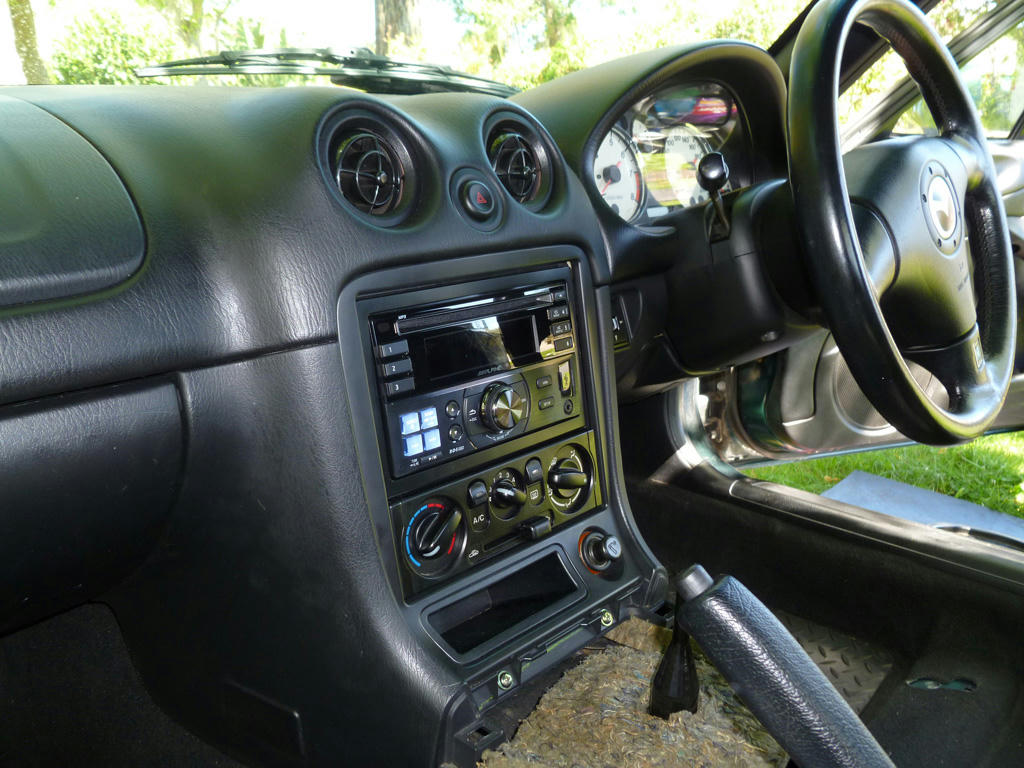
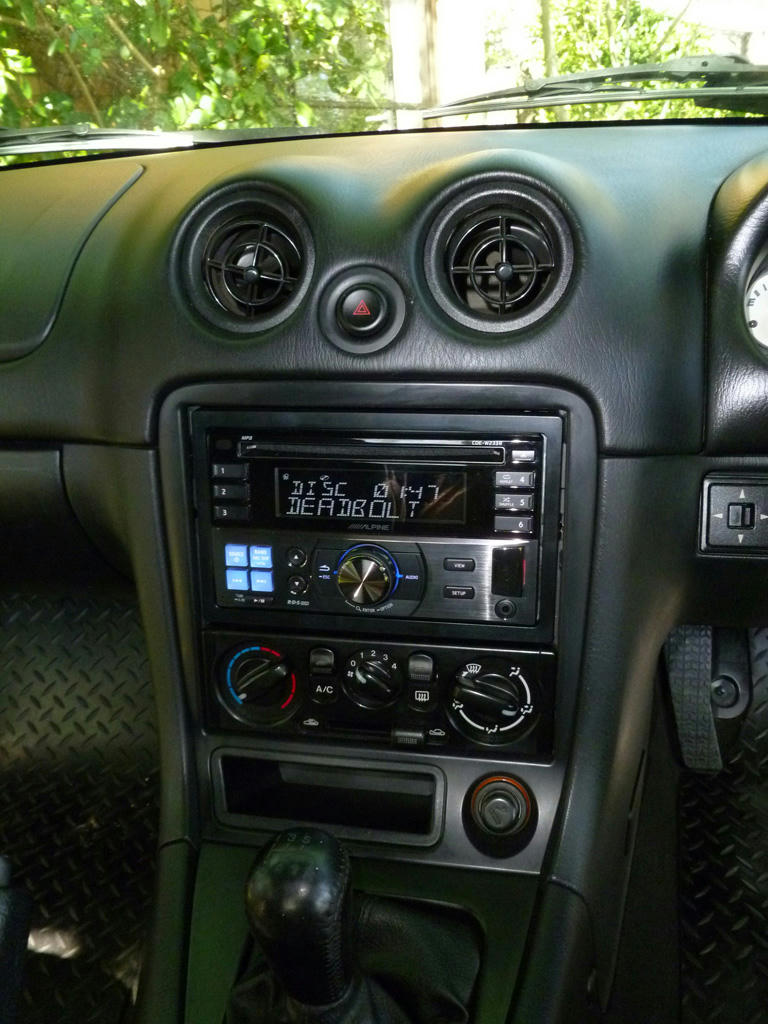
After all that I managed to make a good fit for this Alpine unit I'd bought a while back. The cage was not the most strudiest or tightest I've used before, but the fascia panel provided a good finish.
After removing the glovebox by squeezing out the lugs, I could take a look how these damn brackets were hanging on. These things are pretty strong with a good amount of travel keeping them clipped in like springs. Here's the view from the footwell looking out toward the back of the car.
You can see the chunky D-shaped clips screwed to the main body of the factory stereo. When I tried insert awls, or the Din ring removers I could see they were simply sliding in between the clips and the stereo itself, rather than on the outside of the clips, so that you can then push them in to pull them away from the housing. Basically you're normally pulling on the rings outward, which are pivoting against the clips and pushing them inward, unlocking them. Easier said than done when facing the holes from the seats.
In the end I pushed against the clips with a flat headed screwdriver from the footwell, pushing them down and allowing your din removers, awls or in this case nails to slide in on the outside of the clips. Even this was a tight squeeze, and it's just so much easier to slide them in between stereo and clip which you don't want.
Here's the nails all in, the bottom one seemed the toughest to get on the outside.
You'll note the scratches left by my screwdriver trying to get leverage.
After that it was the same deal on the other side, though access is even more limited with the steering wheel in the way. I ended up removing the trim piece underneath the wheel, then when I still couldn't quite get my 6' 3"+ frame crammed in, I ended up unbolting the drivers seat, lifting the roof, and giving my neighbours something to laugh about as I contorted into my footwell lying on my back with legs akimbo over the windblocker!
Due to the poor access compared to the passenger side the clip releasing was a lot harder, as it was just a PITA to get any sort of leverage against clips to close them and make room for the nails. However persistence pays off and the unit came loose and lifted out pretty nicely after that.
After all that I managed to make a good fit for this Alpine unit I'd bought a while back. The cage was not the most strudiest or tightest I've used before, but the fascia panel provided a good finish.
-
Tallorder
- Driver
- Posts: 53
- Joined: Wed Oct 07, 2009 1:52 pm
- Vehicle: NB8B
- Location: Victoria
Re: The Idiots guide to replacing a stereo in the NB8B
Unfortunately I couldn't edit my old post but let's see if I can dig out the pics and post again
After removing the glovebox by squeezing out the lugs, I could take a look how these damn brackets were hanging on. These things are pretty strong with a good amount of travel keeping them clipped in like springs. Here's the view from the footwell looking out toward the back of the car.
You can see the chunky D-shaped clips screwed to the main body of the factory stereo. When I tried insert awls, or the Din ring removers I could see they were simply sliding in between the clips and the stereo itself, rather than on the outside of the clips, so that you can then push them in to pull them away from the housing. Basically you're normally pulling on the rings outward, which are pivoting against the clips and pushing them inward, unlocking them. Easier said than done when facing the holes from the seats.
In the end I pushed against the clips with a flat headed screwdriver from the footwell, pushing them down and allowing your din removers, awls or in this case nails to slide in on the outside of the clips. Even this was a tight squeeze, and it's just so much easier to slide them in between stereo and clip which you don't want.

Here's the nails all in, the bottom one seemed the toughest to get on the outside.
You'll note the scratches left by my screwdriver trying to get leverage.
After that it was the same deal on the other side, though access is even more limited with the steering wheel in the way. I ended up removing the trim piece underneath the wheel, then when I still couldn't quite get my 6' 3"+ frame crammed in, I ended up unbolting the drivers seat, lifting the roof, and giving my neighbours something to laugh about as I contorted into my footwell lying on my back with legs akimbo over the windblocker!
Due to the poor access compared to the passenger side the clip releasing was a lot harder, as it was just a PITA to get any sort of leverage against clips to close them and make room for the nails. However persistence pays off and the unit came loose and lifted out pretty nicely after that.
After all that I managed to make a good fit for this Alpine unit I'd bought a while back. The cage was not the most strudiest or tightest I've used before, but the fascia panel provided a good finish.
After removing the glovebox by squeezing out the lugs, I could take a look how these damn brackets were hanging on. These things are pretty strong with a good amount of travel keeping them clipped in like springs. Here's the view from the footwell looking out toward the back of the car.
You can see the chunky D-shaped clips screwed to the main body of the factory stereo. When I tried insert awls, or the Din ring removers I could see they were simply sliding in between the clips and the stereo itself, rather than on the outside of the clips, so that you can then push them in to pull them away from the housing. Basically you're normally pulling on the rings outward, which are pivoting against the clips and pushing them inward, unlocking them. Easier said than done when facing the holes from the seats.
In the end I pushed against the clips with a flat headed screwdriver from the footwell, pushing them down and allowing your din removers, awls or in this case nails to slide in on the outside of the clips. Even this was a tight squeeze, and it's just so much easier to slide them in between stereo and clip which you don't want.
Here's the nails all in, the bottom one seemed the toughest to get on the outside.
You'll note the scratches left by my screwdriver trying to get leverage.
After that it was the same deal on the other side, though access is even more limited with the steering wheel in the way. I ended up removing the trim piece underneath the wheel, then when I still couldn't quite get my 6' 3"+ frame crammed in, I ended up unbolting the drivers seat, lifting the roof, and giving my neighbours something to laugh about as I contorted into my footwell lying on my back with legs akimbo over the windblocker!
Due to the poor access compared to the passenger side the clip releasing was a lot harder, as it was just a PITA to get any sort of leverage against clips to close them and make room for the nails. However persistence pays off and the unit came loose and lifted out pretty nicely after that.
After all that I managed to make a good fit for this Alpine unit I'd bought a while back. The cage was not the most strudiest or tightest I've used before, but the fascia panel provided a good finish.
Who is online
Users browsing this forum: No registered users and 1 guest


