Here is a guide to swapping out the 2.0 and replacing it with a 2.5L engine.
First some handy links for reading.
http://forum.miata.net/vb/showthread.php?t=522719
A good guide to swapping the engines, although its a little brief
http://forum.miata.net/vb/showthread.php?t=563578&highlight=crank+pulley
This one corrects some info in the above post
http://en.wikipedia.org/wiki/Mazda_L_engine
A brief guide to Mazda "L" series engines
http://forum.miata.net/vb/showthread.php?t=536603&highlight=crank+pulley
Another one I found handy for reference
http://www.good-win-racing.com/manuals/Cosworth-2005-2008-MX-5-Installation-Instructions-4MAR2010_AD.pdf
Better to save the Good-Win SC guide, as you will need it
Read all of that?........ great.
Now you understand its not that hard. The biggest hurdle for me was confidence.
You will need the following parts well before you start.
6PK2305 or 6PK2310 belt, ARP bolt 261-2501 for crank pulley. Degreaser, oil safe silicon,
large cable ties and coolant hose lube. Also a bag of zip-lock lunch bags so you can label and store bolts etc.
Ball point pen, sharpie marker and utility knife blades. Wax and grease remover and rags.
 DSC_2086 by adrianvh
Tuning software and a base map. I use and recommend EcuTek via Dynotronics.
New oil filter
Permatex Plastic Weld epoxy
 51hglO+4awL._SY355_ by adrianvh
Mazda Diamond friction washer
 DSC_2130 by adrianvh
Massive speed Balance shaft delete kit
 fd94c5bc-f495-46d0-a9ac-00837003ef06-800 by adrianvh
Massive speed timing kit
 093a0ef3-eaa6-4f35-a151-d48dd3d113d4-800 by adrianvh
Flywheel lock
 DSC_2126 by adrianvh
(The last two are available on loan from me)
You will want your 2.5L motor a few days before you swap the engines.
 DSC_2051 by adrianvh
Remove the PCV cover and degrease the inside of it so you can alter it. It wont clear the 2.0 intake manifold.Remove the valve connector and with a hack saw or dremmel tool, trim the PCV case as shown. Clean it up the edges & degrease.
 DSC_2053 by adrianvh
 DSC_2056 by adrianvh
  DSC_2057 by adrianvh
 Next get a shopping bag (polyethylene) and compact it into the back of the cut area to make a barrier.
 DSC_2060 by adrianvh
Mix the Plastic Weld epoxy and apply it to the back, make sure it sits proud so you can push the epoxy through the hole and get it to spread out on the inside and create a seal.
Trim off any excess and wait for it to set.
 DSC_2061 by adrianvh
 DSC_2062 by adrianvh
 DSC_2064 by adrianvh
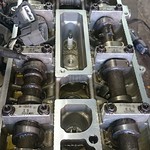
Remove the oil pan and intake manifolds. These wont be re-used.
Note some 2.5L blocks have bolts on the exhaust, my 2.0 has Studs. Studs are better!
 DSC_2097 by adrianvh
Remove the thermostat and housing, this wont be re-used
Remove the coolant by-pass and EGR valves on the back of the block as this wont fit the RWD engine bay.
 DSC_2098 by adrianvh
Remove the Balance shaft assembly bolts (4) and oil fed tube. Carefully insert the Balance shaft delete bolt/stopper into the bolt hole and oil feed hole as shown
Remove the 2.5L oil pick up tube, this wont be re-used.
 DSC_2067 by adrianvh
 DSC_2101 by adrianvh
 DSC_2102 by adrianvh
Remove the oil filter and filter mount. This wont be re-used.
Clean the block surface where the oil pan attaches with a blade and wax and grease remover. You will want this and the front timing cover step spotless. Be very thorough !
Ditto for the oil filter mount.
Now its time to remove the 2.0. I didn't have a hoist so had to do the top out method.
The very first thing you want to do is take lots of pics, of every connection and side/angle of the engine. You cant have to many and its a good guide when putting it all back.
Especially take pics of the plumbing around the throttle body and intake manifold.
Follow the Cosworth Supercharger instruction up to step #72.(belt removal)
Unbolt the gearbox from the engine block and store in the plastic zip-lock lunch bags with a label. Unbolt the clutch slave and line, including the one under the intake manifold.
Lift cover off the fuse box and remove the plug and bolt lead as shown.
 DSC_2116 by adrianvh
Remove the ECU wiring harnesses. The wiring harness you unclipped from the fuse box and ECU can be moved over the engine once a few clips are undone.
Unbolt the power steering pump and gently position over the ECU and hold in place with zip ties. Remove the air-con compressor and position up near the fuse box with out stressing the flexible lines, cable tie in place.
Remove the coolant return hose above the exhaust manifold and then remove the exhaust manifold and oxy sensor plugs.
 DSC_2072 by adrianvh
Take the engine lift hanger off your new 2.5L block and bolt it to the rear bolt of the coolant return line above the exhaust manifold. This gives you two opposed lifting points.
Then slowly lift the engine out, making sure all lines are clear and nothing is getting snagged.
 DSC_2083 by adrianvh
I found it easier to jack the gear box up so its angled upwards, this made it easier for the drive shaft to come loose.
Double check everything is clear as you slowly raise the old engine out.
Position it on a firm solid surface, I used timber blocks to keep it level.
You will want to remove and transfer the following to your new 2.5L block
Alternator
Starter motor
Oil filter mount and new filter
Coolant lines and PCV lines
Idler pulley
Belt tensioner pulley
Thermostat and housing
Exhaust manifold studs. My 2.5 had one stud and it was to long to clear the extractors.
 DSC_2114 by adrianvh
Oil pan and oil pick up tube, make sure you get the O-ring. Clean the pan and silicon in place. Tighten bolts to spec.
Rocker cover, the 2.5L cover has slight differences so use the 2.0 cover.
Upper intake manifold (black plastic) and lower intake manifold (aluminium).
If you position the lower intake manifold on the new 2.5L block and feel the inside where they meet you will feel the slight difference in sizes. Fixing this is optional but I did for peace of mind.
Get the metal gasket that came off the 2.0 block and place it on the lower manifold engine side. There is a slight difference in sizes, this can be marked with a sharpie marker. Then use a file or dremmel tool with an aluminium hgrinder to grind down to this mark. It wont be perfect as there is still a small step but its an improvement and helps with smooth airflow. See below.
 DSC_2089 by adrianvh
 DSC_2090 by adrianvh
 DSC_2094 by adrianvh
Remove the 2.0 engine mounts and set aside, these will be reused on the 2.5L
Next is the flywheel but before you do, you will need to remove the 2.0 Crank pulley. Brace the flywheel with a long bar or flywheel lock as shown below.
 DSC_2111 by adrianvh
Put your breaker bar onto the crank bolt and loosen it. Its on damn tight but will budge with body weight.
Once that's off, clean up any surface rust with 400 wet and dry, degrease it and set aside. Now remove the flywheel from the 2.0 and bolt it to the 2.5L. Once bolted to the 2.5, follow the below steps exactly.
Rotate engine clockwise until cam slots are lined up and insert the cam tool at the rear of the Cams
 DSC_2118 by adrianvh
Lock the flywheel with a bar or flywheel lock, then remove the cam timing tool. This is where a flywheel lock wins the day.
Remove the crank pulley and crank bolt from the 2.5L and discard, they wont be re-used. Make damn sure you remove the old diamond washer, its hard to get out of it hiddy hole.
Install the 2.0 crankshaft pulley and ARP crank bolt, then hand tighten. Then remove the flywheel lock or bar.
Install the shorter purple timing peg into hole on the lower right side of engine block
Rotate engine clockwise until engine comes into contact with timing peg. My 2.5L block rotated about 3-4 degrees so it wont be much.
Loosen the ARP crank pulley bolt
Rotate the pulley until small hole lines up with threaded hole in timing cover and screw in an M6 bolt.
Re-install the cam-timing bar in the slots on back of cams.
With the crank against timing purple peg, the M6 bolt installed through the crank pulley, and the timing bar in the cams, torque the crank bolt to 25ft/lbs
Remove the peg from block, m6 bolt from pulley, and timing bar from cams.
Rotate crankshaft 1.5 revolutions, install timing peg into block, and turn crank shaft .5 a revolution until crank contacts the purple peg. Then install m6 bolt through pulley and cam timing bar.
If you can not install the m6 bolt or cam timing bar then your timing is out of phase
Now remove the purple peg, m6 bolt and timing bar from the cams.
Lock the flywheel without rotating the engine with the flywheel lock or bar.
Tighten the ARP crank bolt in small stages, with 10-15 minutes between successive tightening. So from 25ft/lbs tighten to 50ft/lbs then wait 10 min. Do this in steps to 140 ft/lbs .
You will need assistance in holding the block while you do this.
Next clean internally the upper and lower manifolds and install the lower manifold only at this stage.
Use the 2.5L injectors but use the 2.0 fuel rail. Use the 2.0 spark plugs and ignitors.
Install the 2.0 coolant by-pass and EGR valves onto the 2.5L block.
Install the 2.0 Crank angle sensor onto the 2.5L. This is a sensor bolted to the timing cover down low right next to the crank pulley.
Tighten flywheel bolts to spec and install the clutch with a clutch alignment tool. Make sure you grease the input shaft socket.
You should now be able to transfer the wiring harness from the 2.0 to the 2.5L block
Transfer both engine lift hangers to the new 2.5 block and get it aligned for installation. You will want the block angled down at the rear at about 15 degrees.
Jack the gear box up until its roughly 15 degrees from vertical.
Now slowly lower the 2.5 block into the engine bay. Make sure you clear power steering lines and air con lines.
You will notice the rear is close, I had to bend some cowling brackets to get it to clear.
 DSC_2112 by adrianvh
Its a tight fit to get it past the front cross member but with 2 guys, some long bars and gentle manoeuvring you will get it in place.
The hardest part was aligning the input shaft. It wasn't to hard to get the gearbox lined up with a 15-20mm gap. This allows you to crawl under the car and rotate the flywheel a little through the gap.
Again with a bit of wiggling it will pop in.
do up 3 or 4 gearbox/engine bolts firm, but not tight.
Now install the engine mounts and tighten to spec.
Lower the jack holding the gear box and slowly lower into position on the engine blocks, tighten nuts to spec.
Install the remainder gearbox/engine bolts and tighten to spec. Make sure you get them all.
Now install the exhaust manifold and tighten.
Position the intake manifold and guide the PCV hose underneath into position on the modified PCV cover fitting. This can be tricky as your putting it on in-between the gap of the upper and lower intake manifolds. This is where the coolant hose lube is great. This stuff makes re-installing the coolant and air hoses a breeze.
Now look back over your pictures and re-attach all the hoses and lines. Double check it all.
Bolt on the air con compressor and power steering pump.
Re-install the radiator drain plug.
Re-attach the clutch, dont forget the clip under the intake manifold. Re connect all your plugs and fittings to starter motor.
Re-connect radiator lines and slowly fill with new coolant from the radiator cap. Mine took 6-7 litres to fill.
While this is settling, double check all bolts and nuts.
Fill with new oil. My block was dry as a bone and required 5.9 liters
You will want to reuse the 2.0 oil dipstick due to the shallower pan of the 2.0 oil pan.
Recheck your fuel lines and vacuum lines. Click all hose clamps and holders into place.
Re attach the ECU connectors and fuse box connectors.
Install ECU cover and Air cleaner assembly. Re install battery box.
Check the car for oil or coolant leaks.
Re-attach the strut brace, cowling plate, top cowling, wipers and fittings
Install battery and connect the terminals.
 DSC_2128 by adrianvh
Follow the manufacturers instructions to re-program your ECU.
Start the motor and bask in the glory of a job well done.